Hand Gathered Home

  • Our Home
    • Front Porch
    • Entryway
    • Living Room
    • Kitchen
    • Dining Room
    • Master Bedroom
    • Bathroom
    • Nursery
    • Kid Rooms
  • Shop Our Home
  • Shop My Favorite Things
  • Shop My Amazon Storefront
  • Virtual Design Services
    • Meet the Team
    • Portfolio
  • About
    • Disclosure and Privacy Policy
  • Videos

Spring Porch Refresh for Under $100

Front Porch

17 May
51 shares
  • Share
  • Tweet
ONE THING I RARELY SPEND ANY TIME OR EFFORT ON IS THE EXTERIOR OF OUR HOUSE… THAT IS, UNTIL NOW. WE HAVE LOTS OF PLANS FOR THE OUTSIDE OF OUR HOUSE IN THE NEXT MONTH OR SO, SO THAT WE CAN ENJOY OUR OUTDOOR SPACES FOR THE SUMMER.

Here’s what we were working with…

Spring Porch Refresh

This post may contain affiliate links, which means I make a small commission at no extra cost to you.

The before wasn’t the absolute worst thing, it was just worn out and dull.

So here’s what we did…

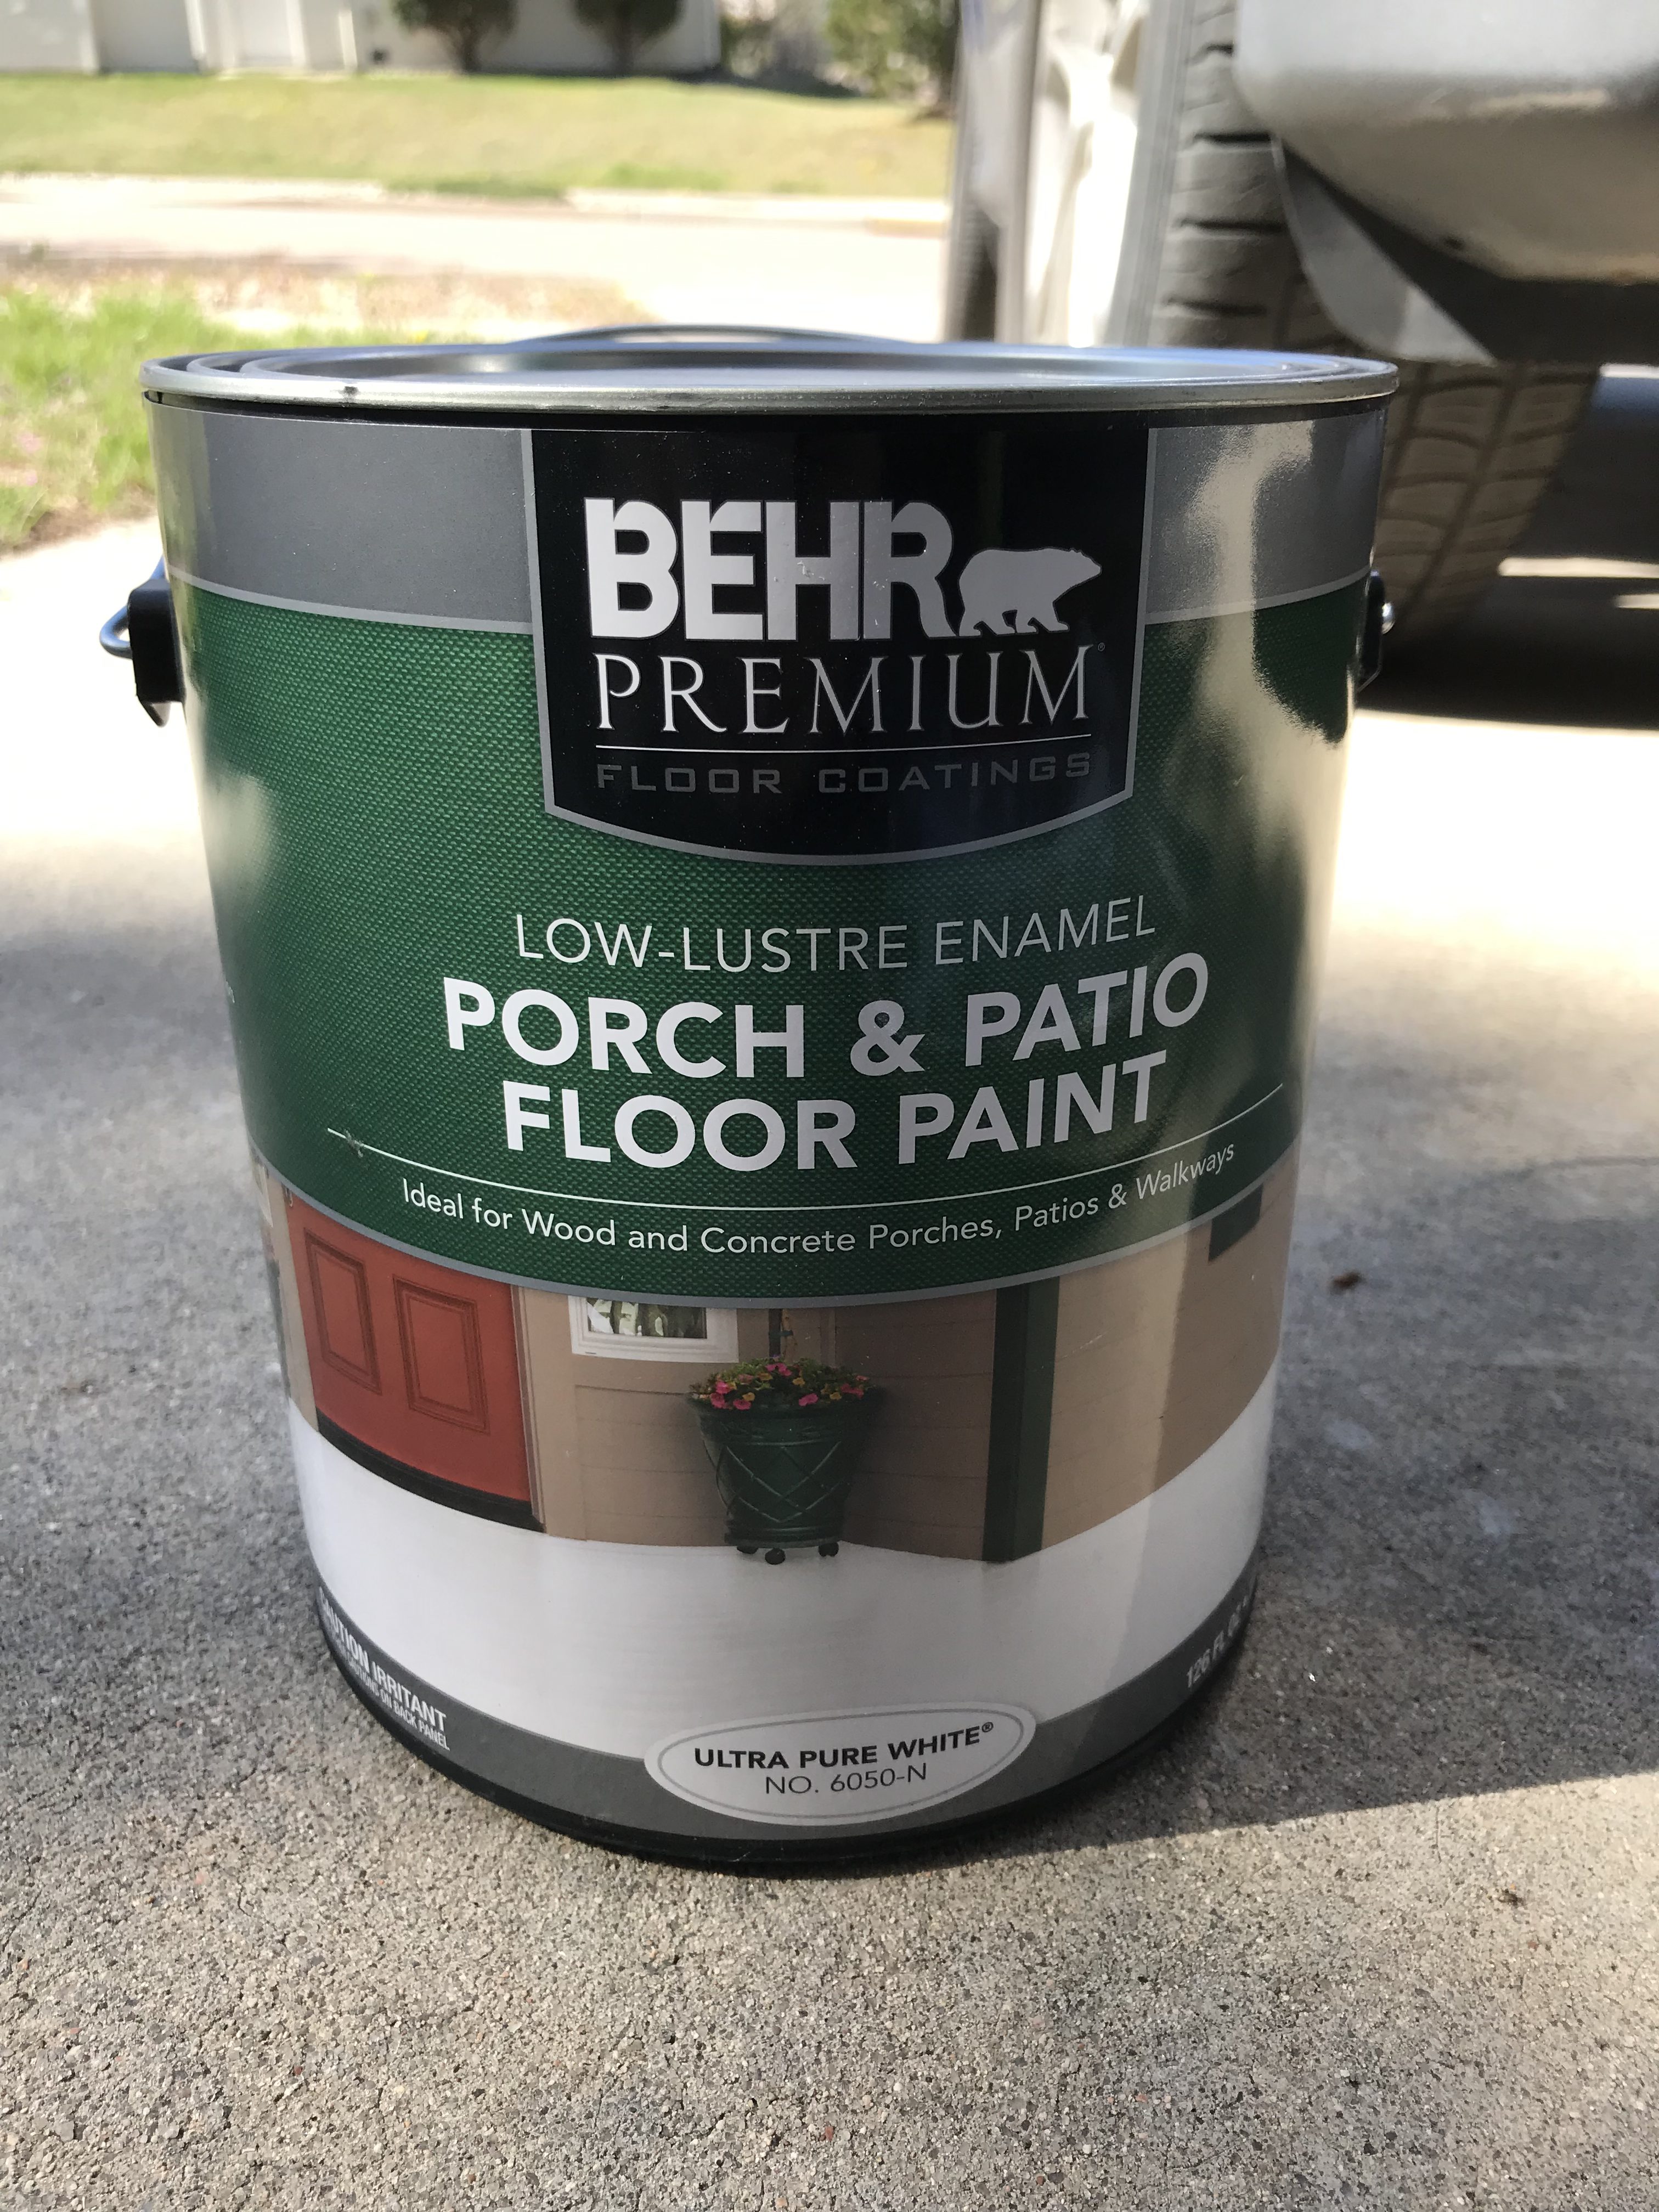
1. We painted our concrete porch

We picked up a can of this Porch and Patio Floor Paint. There were tinting options, but only one white option, so I just stuck with the Ultra Pure White. To be honest, it’s a little more of a bright white than I had hoped. Mainly just when the sun is shining directly on it. It’s a little blinding. But, I know it’s going to fade with the sun and get dirtier from feet, so I’m pretty sure that will soften it up a bit. (Probably pretty quickly too, since we’re 6,000 feet closer to the sun than most people. It just makes the sun a little more intense haha). You can find a similar option here.

Spring Porch Refresh

Probably wouldn’t have hurt to prime it first…

We didn’t prime the concrete first, simply because it’s a pretty low traffic area and it was cheaper not to (oops).

I would probably recommend for others to prime (solely so that I don’t feel responsible if it chips or peels or whatever).

Within an hour or so, the porch was completely painted. It was simple. Using our roller and a broom stick (as an extension handle), we got to work.

We painted first, and then went back and trimmed the edges once it was dry (like 30 mins or so, the can says an hour). It only took one coat. It probably wouldn’t have hurt to do a second coat, but I think it covered pretty well the first time. There was definitely enough paint in the can for another coat though, just FYI.

Spring Porch Refresh

2. Flowers and Pots

This was our Mother’s Day project (and quite possibly a tradition in the making). We went to breakfast and then went straight to Home Depot for some flowers and pots.

I had 2 galvanized tubs at home that I knew I wanted to use, and then I had maybe one extra terra cotta pot laying around. In order to keep it really simple, I picked up a few more terra cotta pots and pot plates (is that what they’re called?).

Here are a few cute planter options:

Galvanized Planters (2) / Terra Cotta Pots (6) / Galvanized Buckets (3)

Spring Porch Refresh

What kind of flowers did I get, you might ask… No idea. Unfortunately, the name tags got thrown away. However, I do know that the greenery is Dusty Miller. I really liked the way that it looked. Kind of a soft green and fuzzy.

Other than that, I just picked some white and purple/pink flowers to go with it.

Here they are in my garage, waiting for the porch to dry.

Surprisingly, Amazon has a lot of really great plants options.

Spring Porch Refresh

3. New Lights (YAY)

We bought the new lights from Costco a year ago. They’ve been sitting in our basement, in their boxes, since then. Needless to say, I’m pretty glad they’re up. Also, no more lights and boxes in the basement. I’d call that a win win.

Here are the old lights. I’m just going to take a guess that they’re original to the house. So 23 years old or so.

Fun fact: I was born the same year as our house was built.

Before

Spring Porch Refresh

After

Spring Porch Refresh

Here is a similar, affordable lighting option.

4. Time to put it all together (the best part, of course)

Spring Porch Refresh

Spring Porch Refresh

Spring Porch Refresh


There you have it, friends! We spent under $100 and we successfully refreshed our entire front porch. Gotta love it.

Thanks for reading!

PIN FOR LATER

Spring Porch Refresh


Share this:

  • Click to share on Facebook (Opens in new window)
  • Click to share on Pinterest (Opens in new window)
  • Click to print (Opens in new window)

6 Comments

About Alleigh

« How to Make a Design Board in PowerPoint
DIY Bedskirt Using one 9×12 Dropcloth »

Comments

  1. Kym says

    May 22, 2019 at 9:32 pm

    What a difference a that paint made. Nice.

    Reply
  2. Kym says

    May 22, 2019 at 9:32 pm

    What a difference a that paint made. Nice.

    Reply
  3. Jenn says

    May 24, 2019 at 6:54 pm

    Great job! Much improved, it looks so fresh now!j

    Reply

Trackbacks

  1. 6 Simple and Affordable Ideas to Add Curb Appeal to your Home – Hand Gathered Home says:
    May 19, 2020 at 3:31 pm

    […] It actually needs another coat, which I’ll be doing here really soon. You can check out the full process here. […]

    Reply
  2. Summer Porch Makeover on a budget – Hand Gathered Home says:
    May 30, 2020 at 4:46 pm

    […] To see the process of when we originally painted the porch, click here. […]

    Reply
  3. Painted Concrete Porch - "Just Paint it" Series – Hand Gathered Home says:
    June 5, 2020 at 8:25 am

    […] You can see the full process of how we painted it here. […]

    Reply

Leave a Reply Cancel reply

Your email address will not be published. Required fields are marked *

Recipe Rating


So glad you’re here!

Hi! I’m Alleigh. I’m a mom to my two sweet little boys, and wife to a very supportive husband. I’m so glad you’re here! Join me and my little family as we get our hands dirty and add life & personality to our home to create a place that we love.

Find more about me here

Let’s Connect

  • Instagram
  • Pinterest

On Instagram

handgatheredhome

First thrift haul of 2023 blog and video coming to First thrift haul of 2023 blog and video coming to ya on Friday morning 🙌🏼 Have you been thrifting yet this year?? It’s a goal of mine to be better about checking the thrift store first (rather than just looking on Amazon) when we have a need 🙌🏼
We’re talking decorating for winter this week on We’re talking decorating for winter this week on the blog and YT. Stay tuned for that! Sometimes the house feels a little funny and empty after Christmas decor comes down. Let’s fix that! ✨
Ok let’s hear those 2023 home goals! I have all Ok let’s hear those 2023 home goals! I have all sorts of big plans for my house this year and am excited to bring you guys along. What would you love to change in your home in 2023? I’d love to hear! ✨
I did a thing and I painted my bedroom green. Bold I did a thing and I painted my bedroom green. Bold, I know ;) kidding, as it’s practically a neutral hah. But I do love it and I’m glad I branched out! I’m finishing up a post and video on all the details of this room refresh and then I’ll share 🙌🏼 what’s something you’ve been wanting to do in your house but are a little hesitant to commit to?
Sometimes thrifting is overwhelming, I get it. I f Sometimes thrifting is overwhelming, I get it. I found this super fun, textured lamp today for $10 (kind of expensive for Goodwill in my option 😂). But obviously $10 is a good deal in the grand scheme of things. And with a dimmable light bulb it’s 🙌🏼 who knew!
If you want to feel confident thrifting for your home, I have a FREE ebook for you in my bio. I walk you through all of my favorite things to look for at the thrift store and why 🙌🏼 go check it out ✨
Here are 3 easy ways to style an entryway! 1. Cons Here are 3 easy ways to style an entryway!
1. Console table with 2 lamps and a mirror
2. Console table with sconces and a gallery wall
3. Bench with baskets for shoes (hello, function), you could also add hooks 🙌🏼

#virtualdesign #interiordesign #entrywaystyle #entrywaydecor #entryway #entrywaytable
Check out this before and after from a recent proj Check out this before and after from a recent project of ours 😍
#beforeandafter #virtualdesign #handgatheredhome
Sometimes I miss our old house, because it felt so Sometimes I miss our old house, because it felt so much more put together than our current house. Projects with a toddler and a baby are no joke. But so worth it once they’re done 🙌🏼 working on getting back in the groove of sharing projects over here. I have a few up my sleeve that I’m excited to share soon 🙃
Load More...

Copyright © 2023 · Refined theme by Restored 316

51 shares
 

Loading Comments...