Painting furniture without prep sounds like a dream, right? I think a lot of people hesitate to paint furniture because it can be daunting. But it doesn’t have to be. Read on… 😉

This post may contain affiliate links, which means I make a small commission at no extra cost to you.
Before
I don’t know about you, but I love a good before and after. There’s just something about taking something from a sad state and giving it new life.
So this dresser is actually 2 pieces. But when standing side by side, one of them is about 5 inches shorter. They are otherwise identical. I originally bought them to use as nightstands, but didn’t have the time or energy, at the time, to commit to making them the same height. They also aren’t 100% real wood, which made me think… “hhmm better paint them.”

Supplies needed
The supply list for this project is rather minimal. I’m sure chalk paint isn’t for everyone, but I like it. It makes painting so much easier.
Supplies:
Chalk paint brush or this paint brush (I just use a normal paint brush, but you might get better coverage with a chalk paint specific brush)
Rustoleum Chalked paint (linen white)
Rustoleum Chalk Protective Top Coat (matte finish)
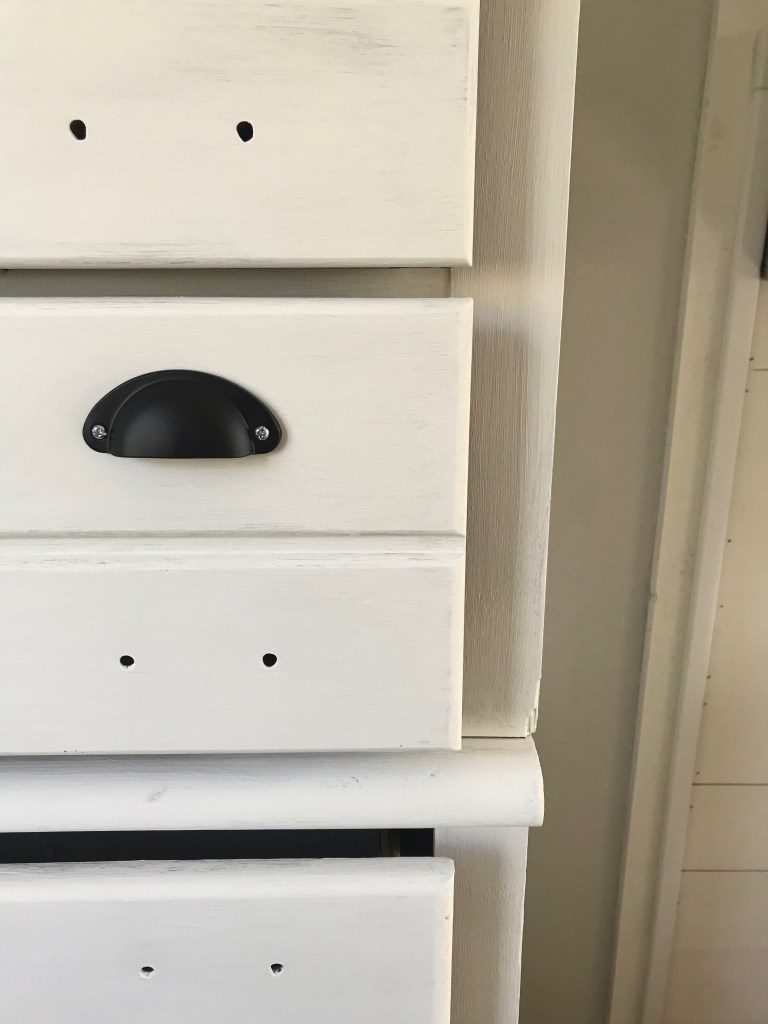
Black Bin Handles (these aren’t actually the ones I bought, but very similar and probably better honestly — I’ll share more on that later on)

Chalk Paint
So the chalk paint claims “one coat coverage”. While it does seem to cover well, I would expect 2 coats. The only thing I can think of is that it might cover better with a “chalk paint paint brush”. I always just use a normal brush, because that’s what I have. But overall, I really love this paint!
It comes in so many different colors, and it requires little to no prep. Whaaat. No sanding or stripping before you paint. It’s a beautiful thing.
Obviously you’ll need to fill any holes or gouges, but otherwise, just jump on in and paint (maybe wipe it down first). Now that’s my kind of project 😉
Just beware that this “Linen White” is very white. It looks great, but just a heads up, in case you were looking for more of a creamy white.

This picture above is what it looked like when I started painting. As you can see, the coverage isn’t 100%. Maybe 70%. But this piece had a shiny finish on it and the chalk paint adhered really well and started to cover it no problem.
Clear Coat
Chalk paint is very chalky… I know, who would’ve known. This clear coat is designed specifically to go over chalk paint, created by the same brand, and it has a matte finish. So there’s no gloss or sheen to it, which I really love. It went on so easily and is really smooth once it’s dried. You definitely don’t want to skip this step. If you do, every time you touch your furniture… let’s just say “nails on a chalkboard”. Yeah, it’s that bad. But the clear coat fixes all!

Bin Pull Handles
These handles were super affordable and so cute. I needed a lot of them for this project, so affordability was key for me.
The handles that I bought from Amazon came with tiny wood screws. I’m not really sure in what world that would work, maybe into a cabinet that doesn’t have a hole drilled yet? But anyway, doesn’t seem very sturdy. So I went to Home Depot and bought machine screws and nuts (46 of them, pretty sure) and then spray painted the screw heads in order to make those handles work. It totally did work out, but I wouldn’t recommend.
I’ve linked a better option for you guys. Still black, super cute and look very sturdy. You can find those here.
More Pics
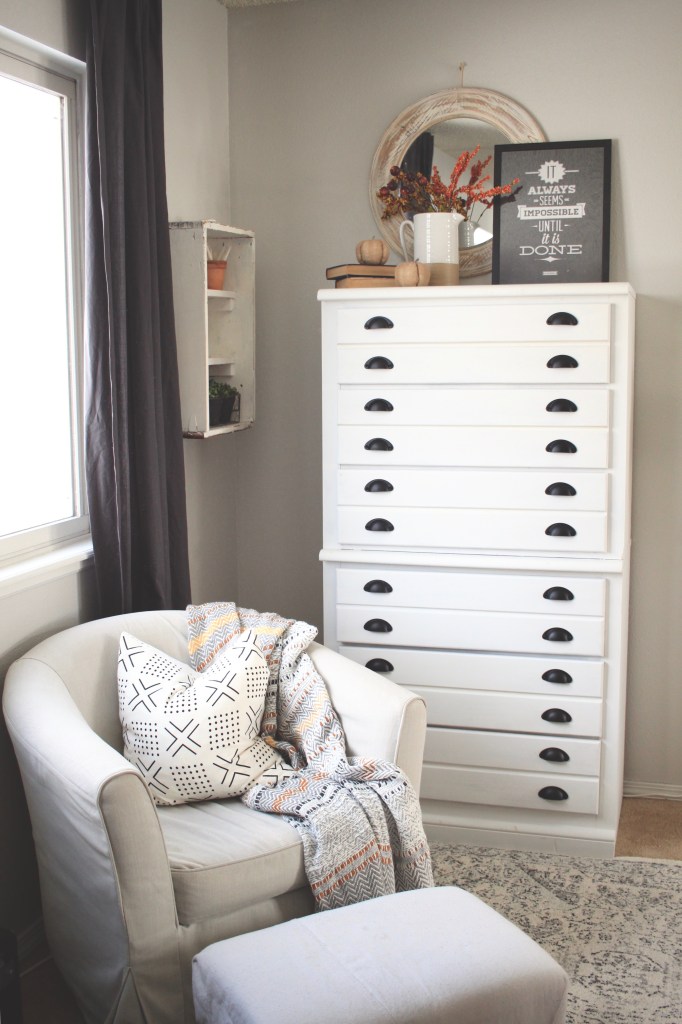


Pin the image below for later. Thanks for reading! 🙂
Pin For Later


You really know how to put Beauty into Functionality! You are a great educator, keep sharing your tips!
Aww thank you!!! I appreciate your words, always.
Were you able to paint the whole dresser using 1 can of paint or did you need 2?
Hi Holly! I had plenty with 1 can.
Beautiful!!! I’m going to try this, thank you! 😃 How is it holding up? Top coat still preventing scratches to the paint?
Hi Amy! Thank you! It’s holding up really well. No scratches or marks yet. Good luck!