If you’re looking for a raw wood look on a piece of furniture, you’ve come to the right place. While not all pieces will be the same amount of work, this process will work for most any solid wood furniture.

This post may contain affiliate links at no extra cost to you. Please read our Disclosure Policy.
I love how organic a “raw” finish looks. It feels so natural and I love that. In order to get a raw wood finish on furniture, you’ll want to follow these steps to both get the look you want and to also make sure it can withstand daily life. This obviously varies based on how much traffic the piece will get. A raw finish will go with just about every color palette and design style. Follow along for my steps on how to get a raw wood finish on furniture.
Before
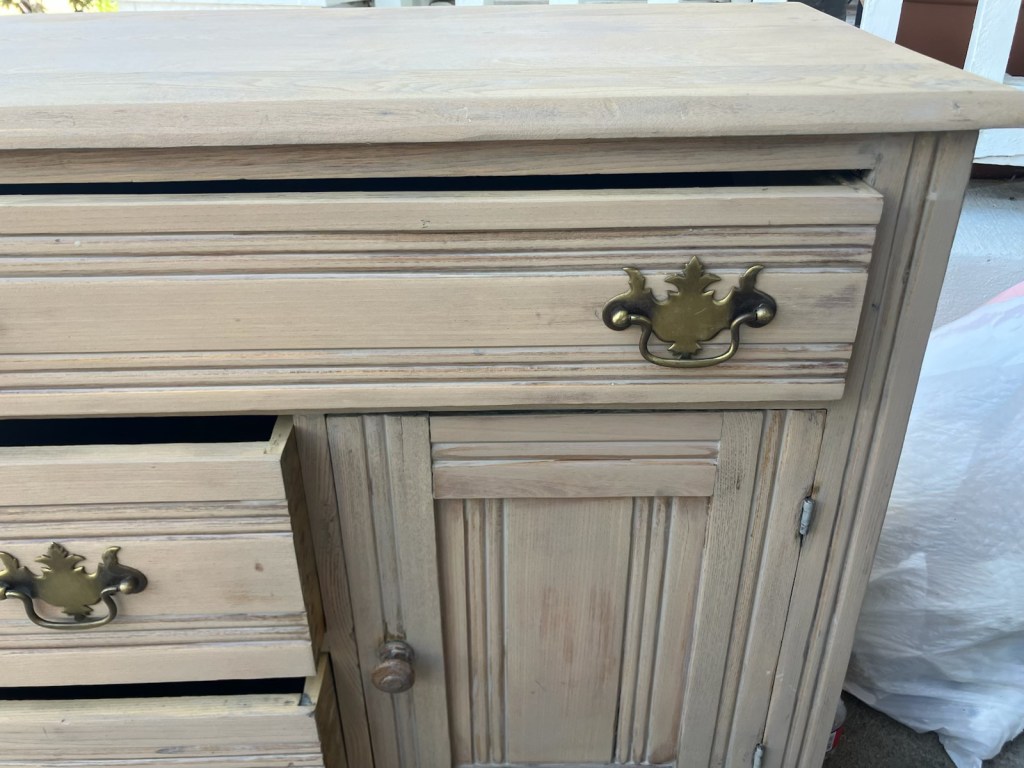
I got this piece on FB Marketplace for $40. While it wasn’t in perfect shape, all the drawers worked and it’s an antique, which means it’s built well. I also loved the handles.

Step 1 – Sand or Strip
First, you’ll want to make sure the piece is real, solid wood and not just veneer. If it’s old and has veneer, just be cautious to only sand a little off at a time to avoid sanding through the veneer. Next, you’ll want to get the finish off of the piece. I personally prefer sanding. Stripping a piece of furniture is much messier and more time consuming, in my opinion. Choose whichever method you prefer. Or do both if you’re working to get a lot of layers off.
So to start, I sanded this piece. It thankfully only had one layer of stain and finish, and really no tricky details, so it sanded quickly. I used 80 grit mostly and finished it with 120 and then 220 to make sure it was smooth.
You’ll want to clean it off really well, to make sure there’s no dust or sanding residue.
Step 2 – Create a Paint Wash
This is a newer process for me, but I love what it does to a piece. It gives you more control over the color of the wood, but the grain is still able to show through. If it’s done right, you wouldn’t even know there was paint involved.
To create a paint wash, first choose a paint color that’s similar to the color of wood that you’re going for.
In my experience, when you sand down a piece to that raw wood state, if you add any sort of clear coat or wax, it’s going to hydrate the wood and make it look much different. Typically it makes the wood look more orange/red immediately. Which would be very disappointing if you’re going for a raw wood look. And the only way to fix it would be to strip/sand the wood again. Adding the paint wash first allows the clear coat to go on without changing the color of the wood.

Next, put some paint in a cup and slowly add water until you get your desired consistency. I shoot for about a 50/50 paint/water mixture. However, I highly recommend testing it on a scrap piece of wood first, adding more water until you’re happy with it and ready to apply it to your furniture piece.
Once you’re ready to apply it to your piece, you’ll need
- Your paint wash mixture
- A paint brush, foam brush, even a sponge
- Paper towels or a rag
- Drop cloth for underneath the piece
You’ll want to work in small areas to be sure you can wipe the paint wash off pretty quickly. You don’t want the paint wash to dry on the piece, before you wipe it off.
Go ahead and use your brush to apply the paint wash to one side of your piece. Once you apply the paint wash to that side, put your brush down and wipe it off. Depending on your consistency, you might need to do it again, if it was too watery.

Step 3 – Let it Dry
You want the paint wash to dry thoroughly before you add a finish coat.
Step 4 – Add a Protective Coat
I like to use this polyurethane clear coat, as it goes on easily and I’ve never seen it yellow over time. You can grab it on Amazon, or at Home Depot, Ace Hardware, Walmart… Check the availability before you go!
I did 1 coat on the front and sides of this piece, and 2 coats of this on the top, as it’s going to be a nightstand and I want to make sure the top holds up well. I honestly probably could’ve done a few more coats on the top, as my husband typically has cups of tea, water etc on top of his dresser. But I was feeling impatient. 🙂

That’s it! It can definitely be a pretty quick and simple process. The only thing that varies in how long it takes is the amount of stripping or sanding it needs. This project, for me, was relatively quick, thankfully! Otherwise I probably still wouldn’t have it finished.

Pin for Later


Leave a Reply